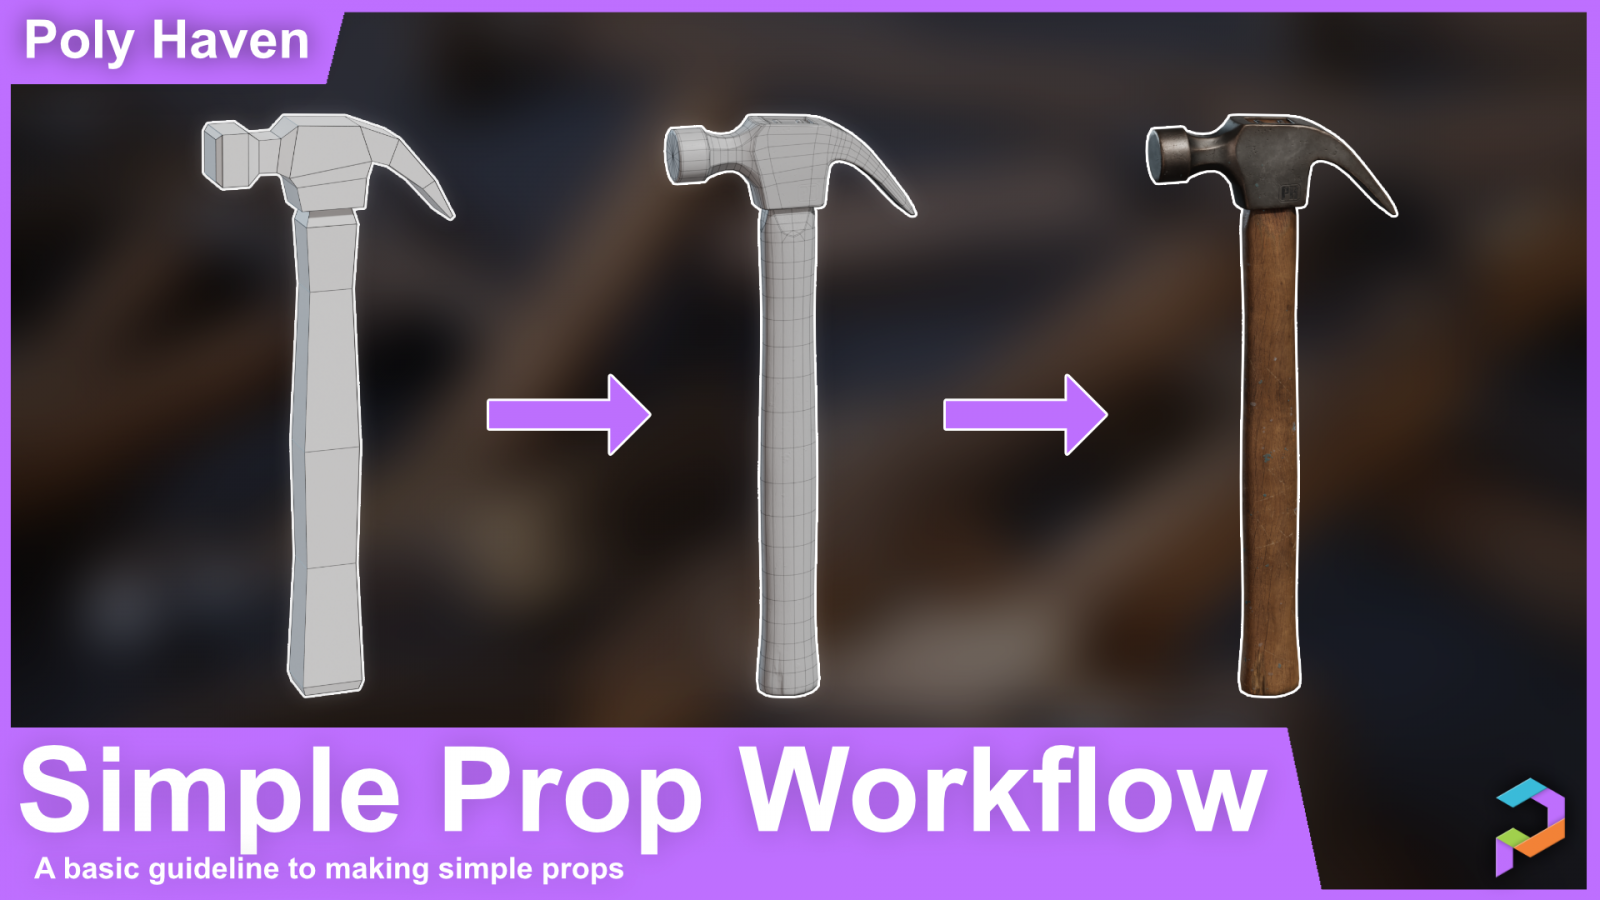
This is not so much a tutorial but rather a very brief breakdown of the process I use to create a simple prop. I’ll go over what is meant by each step and share some useful resources along the way.
The steps I follow are:
- Planning
- Blocking
- Modeling (High + Low Poly)
- Share your work
- UV Unwrapping
- Texture Baking
- Texturing
- Final Delivery
You can find the prop I created in this breakdown here: wooden_hammer_01
Lets get started…
Planning
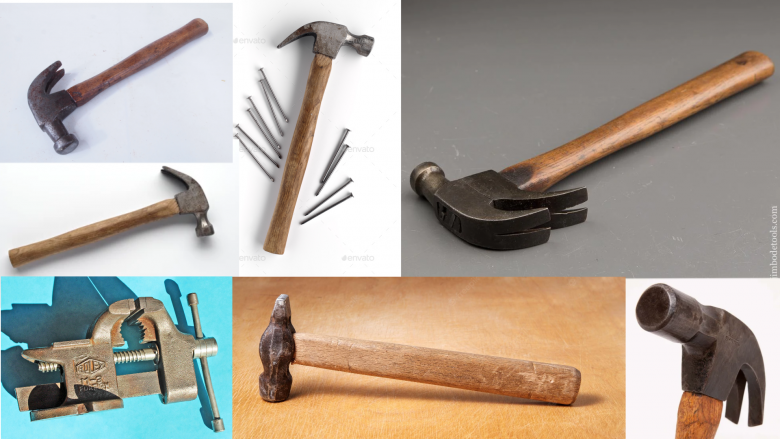
Collect information and reference images for the prop you want to make.
- Get reference for multiple variations of the prop so that you can find different elements to combine to make your work more unique.
- Look for references of the materials the prop is constructed from.
- Research the size and dimensions.
- Research how the prop is made, assembled and used.
Take time to understand your prop because that understanding will shine through in the details and sell realism.
You can arrange these resources in a mood board or stick them in a folder on your hard drive whichever way suits you.
Tools like PureRef are a great way to organise your image references on a board, allowing you to pan, zoom and view multiple references at once.
Blocking
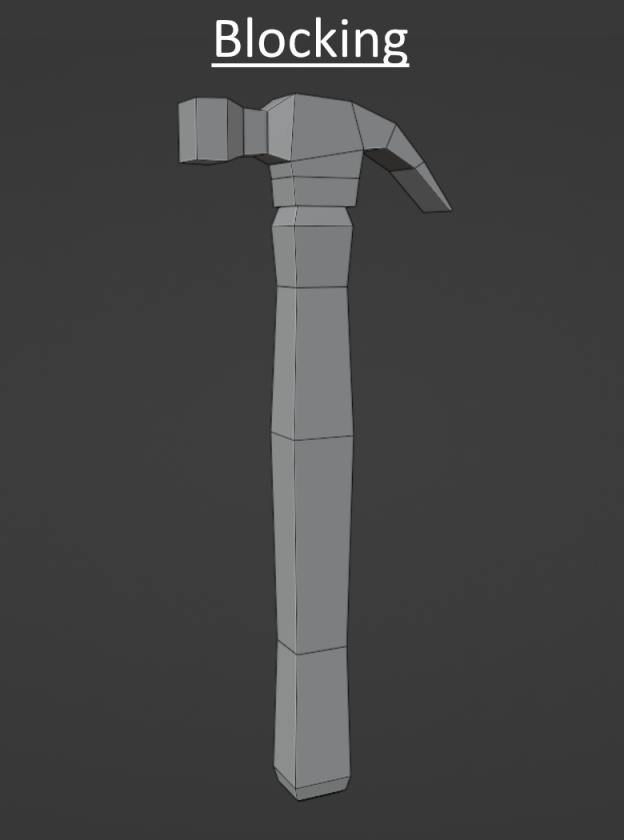
Use very basic shapes to build a mock up version of the prop.
The aim here is to create and capture the core idea for your prop.
Explore! You can try and play with multiple ideas to see what works best.
Pay close attention to the silhouette, proportions and shapes that define the prop.
Keep it simple and don’t get too carried away with the details.
Modeling
Time to model the prop. Follow your blocking model to refine the shapes and geometry to match the idea or reference you were following.
You don’t have to model everything.
There are other ways to add detail to your prop other modeling it all in.
One way to add detail by using normal, bump maps or stamps in the texturing process like I did on this prop with the PH logo imprinted into the metal on the hammer.
If you would like to take things a step further and include a lot of detail in your model, you can make use of a high poly to low poly workflow.
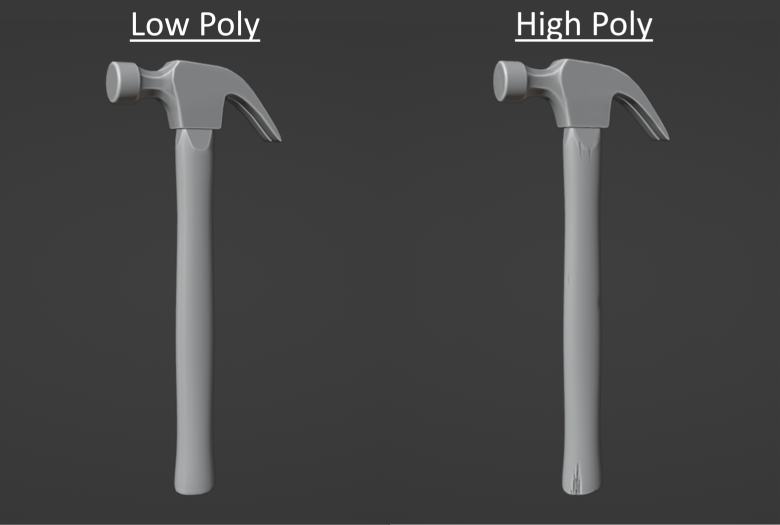
(Optional) High Poly + Low Poly
Though it’s not always necessary, I recommend you make use of a high poly to low poly setup. This method allows you to create a much higher detailed model through things like sculpting, bevels and subdivisions. You then bake that information down to a normal map on a low poly retopologiesed model that is more optomised and manageable.
To make use of this method you need to create 2 versions of your prop. One that will contain all the details that are too small to consider keeping as geometry information and another model that will serve as the final, more optomised, geometry. You can then use one of the software’s mentioned in the upcoming baking step to generate your baked texture maps.
Adding damage, wear, chips and cracks are all very common reasons to use this workflow.
If you have created a high and low poly version of the model you will need to UV unwrap the low poly and continue with the baking step.
Checkout this walkthrough for optomising low poly model.
Sometimes you can go off track when looking at something too closely for a long time. You might not see what some one else does.
Feedback is one of the top ways to grow as an artist. You never know what you might learn and sometimes you’ll discover something new when searching for something to help someone else.
when working on something new, you definitely should start finding feedback sooner rather than later since finding out there is a fundamental problem which could take a lot of effort to fix is definitely discouraging.
I highly encourage you post on forums like Blender Artists Community, Polycount or on Discord communities and ask people what they think.
UV Unwrapping
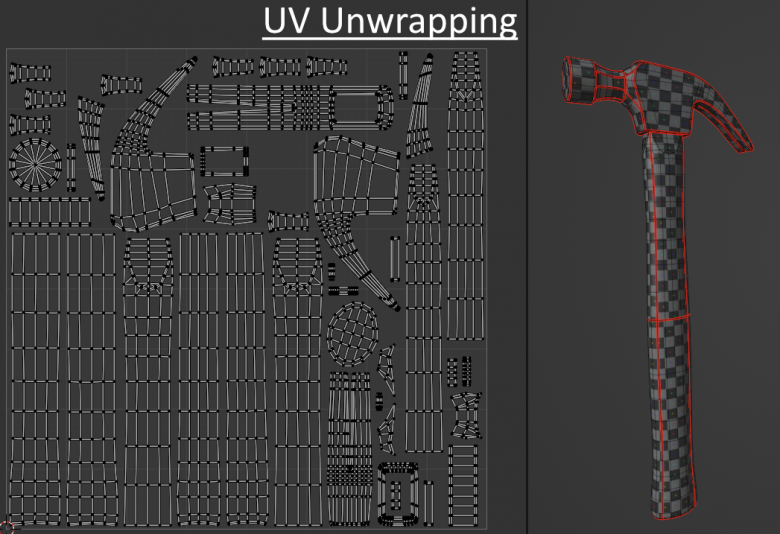
You will need to UV unwrap your model and prepare it for the texturing phase.
This process can sometimes be quite in depth and other times it can be very simple.
There are many factors to consider, so here are some UV Unwrapping Tips for blender.
Some things to be aware of for a prop like this:
- I would avoid overlapping UV islands
- Make sure there is a decent amount of space between the islands
- Ensure there is no stretching.
- The Texel density is consistent.
One way to check for stretching and if the texel density is consistent, is to use a checker texture, like the one shown on the hammer, and making sure the squares retain their shape. The size of the squares should be somewhat consistent across the model though some slight inconsistency is acceptable and sometimes unavoidable.
You might want to spend time laying out the UV islands in a way that makes sense for how you plan to texture it. For example, laying the wooden handle pieces in the same direction making it easier to add a wooden texture to the handle since the wood grain will follow in the same direction.
(Optional) Texture Baking
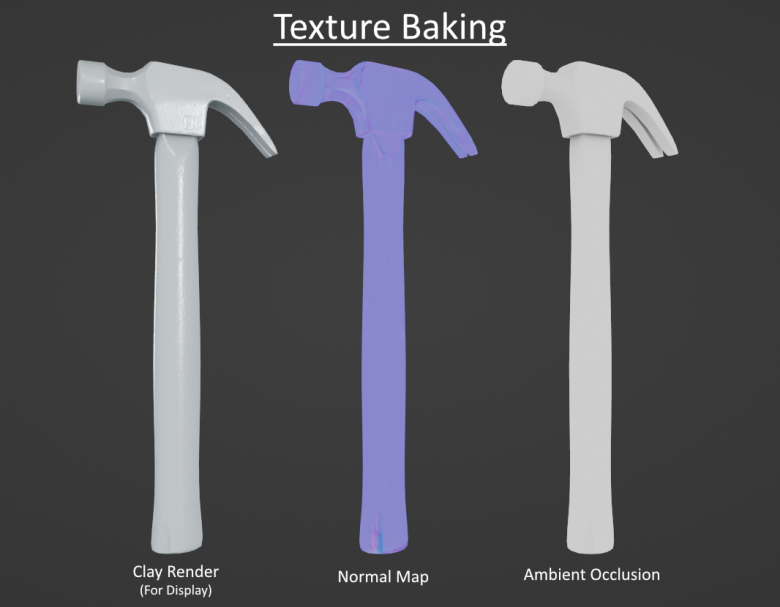
This step is used to bake down the details from your high poly model to normal map information.
Though there are others, generally the types of texture maps that can be generated from baking are:
- Normal Maps
- Ambient Occlusion
- Curvature
- Height
In softwares like Substance Painter baked texture maps like curvature and ambient occlusion could be used in procedural generators for things like edge damages or dirt and grime buildup.
Please note that baking normals is an extensive topic and each software might have different controls and features. At Poly Haven we mostly use a mix of Marmoset Toolbag and Substance Painter to bake our normals and other textures but baking in free software’s like Blender or Xnormal are an option.
Here is a beginner tutorial for simple baking in blender.
For baking in Substance Painter.
And one for fixing baking issues in Substance Painter.
This is a very useful in depth resource for information about normal map baking.
Texturing
Nearly there!
At this step we want to start giving the models’ surface some materials. For most of the models at Poly Haven we use Substance Painter to texture them, but there are other softwares like Mari, ArmorPaint, 3D Coat and Quixel’s Mixer.
Personally I recommend Substance Painter based on the quick and easy results that you can achieve. There is also plenty of learning resources available.
Make use of free trials if they are available and you are not sure which software you want to use.
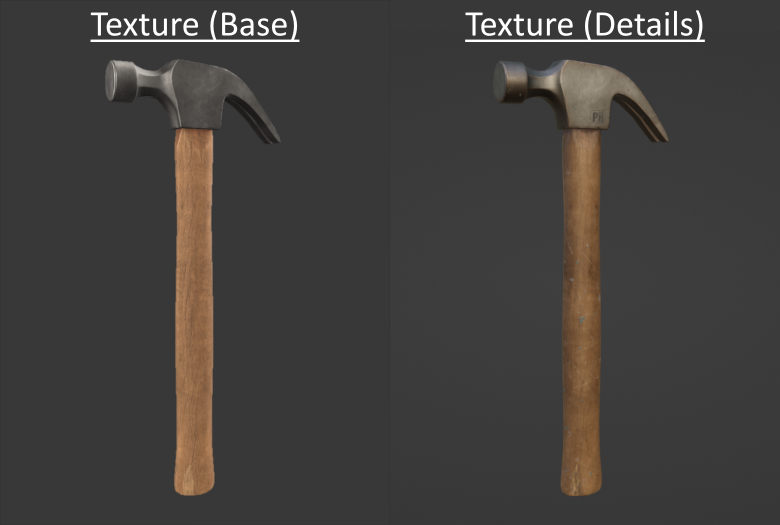
I always begin with adding the base materials and refining them while checking the model in different light setups to get close to their real world counterparts.
As mentioned before, we can add some of the details that were too small to be modeled. I added the PH stamp into the metal here.
Next you can add some gradients, more obvious areas of wear, dirt buildup or rust and lastly, you can add the finishing touches like small scratches and surface dust.
This tutorial by Jason Ord, Substance Painter: Pushing Your Texturing Further, is a phenomenal resource in how to approach a realistic texture workflow.
Time to export your textures.
To keep it simple, I use PNG‘s exported at 16bit.
There are many file types to chose from, each with their own technical pro’s and con’s so be sure to do some research to find out which filetype and settings would suit your needs best.
Final Delivery
Nailed it.
And now it’s finished right?
well… Just one last thing.
Something that is often highly understated is the file format’s and folder structures.
For folders there are really only two things. Keep it simple and neat.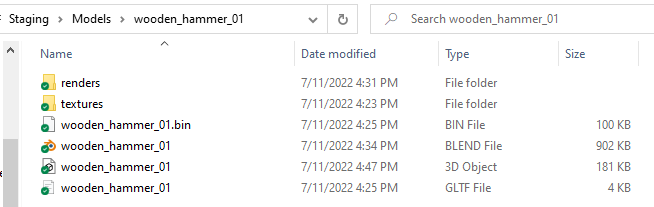
I recommend exporting your asset into a few file formats including FBX or OBJ. Reasons for this is in the case you can no longer open the working file from the software you were using, you’d be able to import one of those other files into a different software instead. It also saves you from having to open your software and export it later if you end up needing it anyway.
Presentation
It’s Hammer Time…
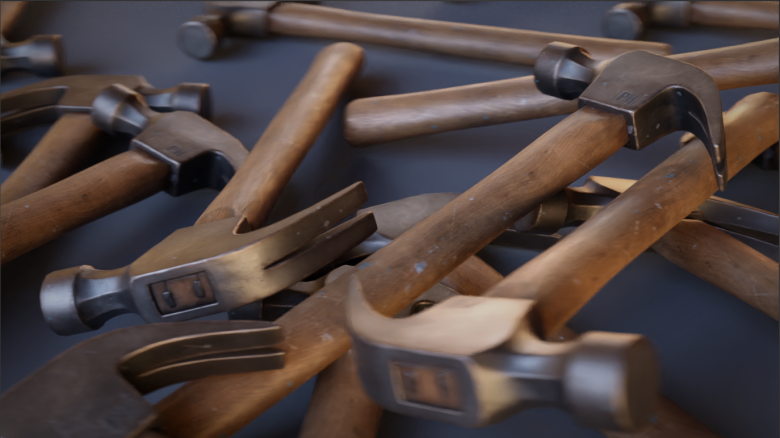
We put so much work in so we might as well show it all off. Do some renders and highlight some of the best parts of your prop. You can use this as an opportunity to learn or practice your skills in scene composition, lighting and post production.
And that concludes things. I hope this was informative and that can help clear up what process you can follow when looking to make a high quality prop.
Some more resources
For info on our internal technical standards PolyHaven Model Technical Standards
If you are looking for a more in-depth step by step guide, I highly recommend taking a look at some of these other free tutorial resources.
Intro to Blender for Game Art – Blender
Modeling & Unwrapping a game ready Flashbang
Baking textures in blender – Blender
If you know of any more that you think other might find useful, let us know and we will add it to the list.
Thank you for the great blog post!
It was very helpful to gain an insight to how these fantastic models are created.
I’m also really impressed with the quality of your new foliage models & textures and if you don’t mind I would love a blog post of the workflow for creating it.
Kind Regards
Tidexon
Hi Tidexon.
Thanks for the Kind words.
Rico has been doing some amazing work on the plant assets and I am sure in the near future we do plant to make that information available in some form.
Cheers!
– James
I used to model in 3DSMax and Zbrush but it’s been years so nowadays I model strictly in Fusion 360 for pretty much everything because of 3D printing and CAM usage. I’d like to contribute some of my models but an unsure if there’s a best practice on importing the models into another program and prepping the maps and poly’s for proper upload.
Hey Jesse,
From my understating it’s not very easy to do this.
It seems like there would be a lot of re-topology involved in order to get good geometry from fusion 360 since fusion is not a poly based modelling software. This would likely also mean that UV’s would need to be created and the model re-textured unfortunately.
I came across this 3 part tutorial which goes over the process however even even model he is using to showcase how it is done has too many tri-angles which can be an inconvenience.
https://www.youtube.com/watch?v=Ev08OujhHD0
I hope this helps.
Thanks.
– James