This post continues from our main HDRI workflow article:
https://blog.polyhaven.com/how-to-create-high-quality-hdri
As you know, it is absolutely imperative that the light sources in an HDRI are not clipped.
In some indoor cases, this is fairly easy to achieve even accidentally, but as soon as you go outdoors and try to shoot the sun directly you’ll realize how absurdly bright it really is, and how difficult it is to shoot without careful thought and planning.
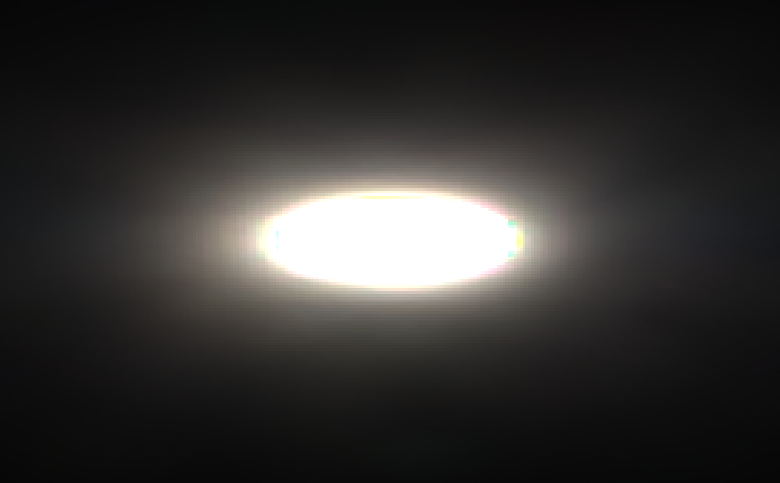
Even at my camera’s darkest exposure settings – 1/4000, F/22 and ISO 100 – the sun is still far too bright to capture without overexposing (clipping) it:
We need to go darker.
Having already reached the darkness potential of my camera, there is only one thing left to use: an ND filter.
ND filters have long been a useful tool in the arsenal of landscape photographers and videographers, so it surprises me how few professional HDRI creators use these things.
Granted, it’s not as simple as slapping one of these babies on your lens and calling it a day, it requires some extra steps when processing the HDRI and an understanding of the implications of this method.
If your minimum exposure settings are like mine (1/4000, F/22), then a minimum of a 12-stop ND filter is needed in order to capture the sun when it is brightest on a clear day at noon. Getting an even darker filter (higher stop number) will allow you to open up the aperture slightly to get sharper images at the same exposure. Once I can afford a new camera, I plan to purchase a 15-stop filter which should allow me to shoot at F/11 instead.
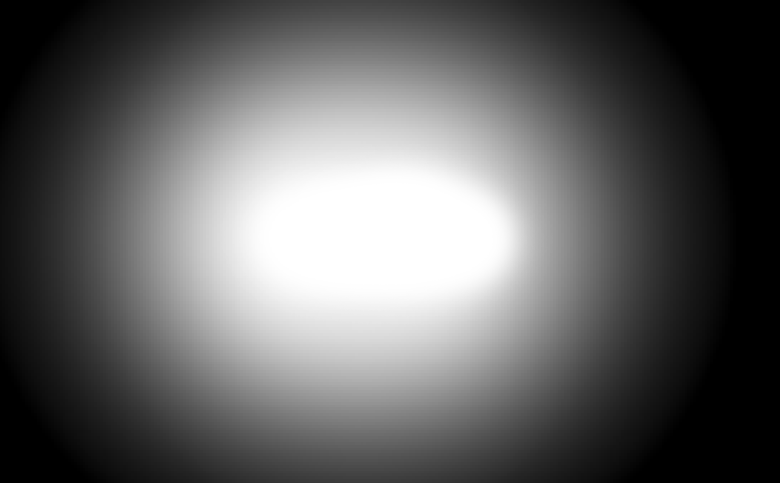
Shooting with the same settings as before, but now with a 12-stop ND filter on my lens, I get this instead:
So now we can shoot the sun without overexposing it, great!
Sidenote: Both of the above images are at the same zoom level (300% crop, shot with 10mm APS-C lens). The sun in the second image is a lot smaller than you might expect, since the glare in the first image makes it seem much bigger.
But now how do we shoot the rest of the panorama? Having a 12-stop filter on our lens makes “normal” exposure photos take about a whole minute to capture. With dozens of angles to shoot to cover the whole 360° panorama, and multiple exposures for each angle… this will take way too long.
The solution: We cheat.
Kind of.
Shooting the whole panorama with an ND filter on our lens is not feasible, but, we don’t need the filter for the whole panorama, we only need it for the sun.
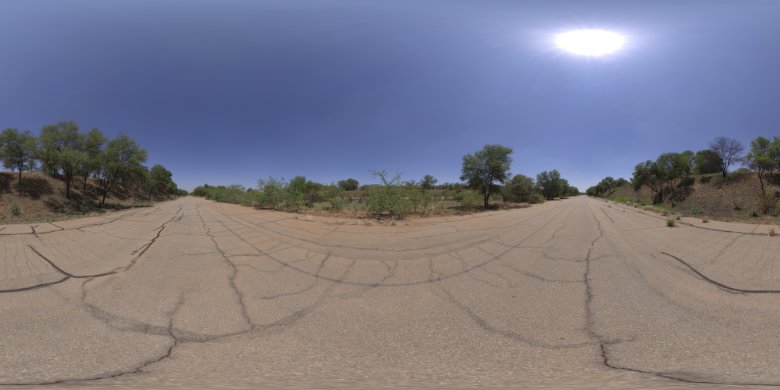
So, shoot the whole panorama as usual (with no filter), and then put the filter on and take a separate exposure bracket sequence of just the sun.
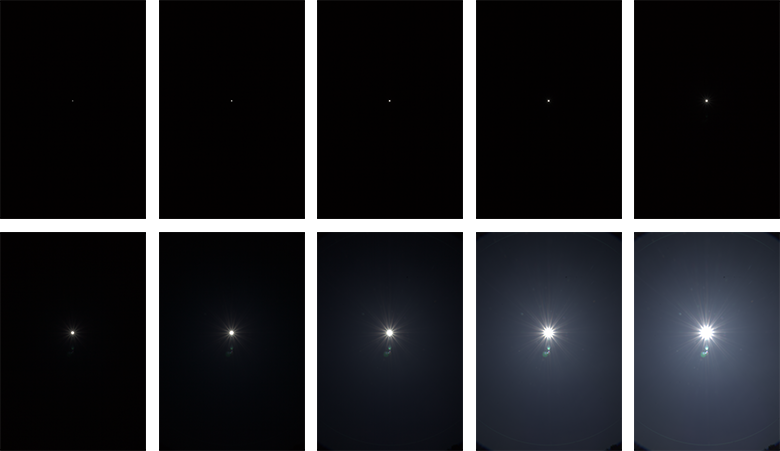
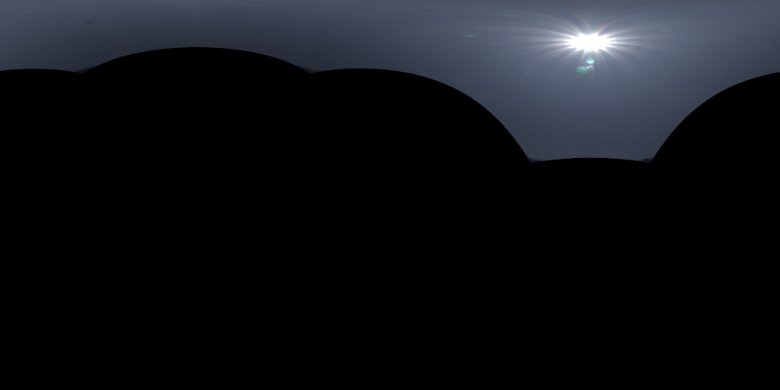
This exposure sequence should be much bigger than the rest of the panorama. I usually go from 1/4000 all the way down to a 30 second exposure in 2 EV increments, meaning there are 10 images in the exposure bracket:
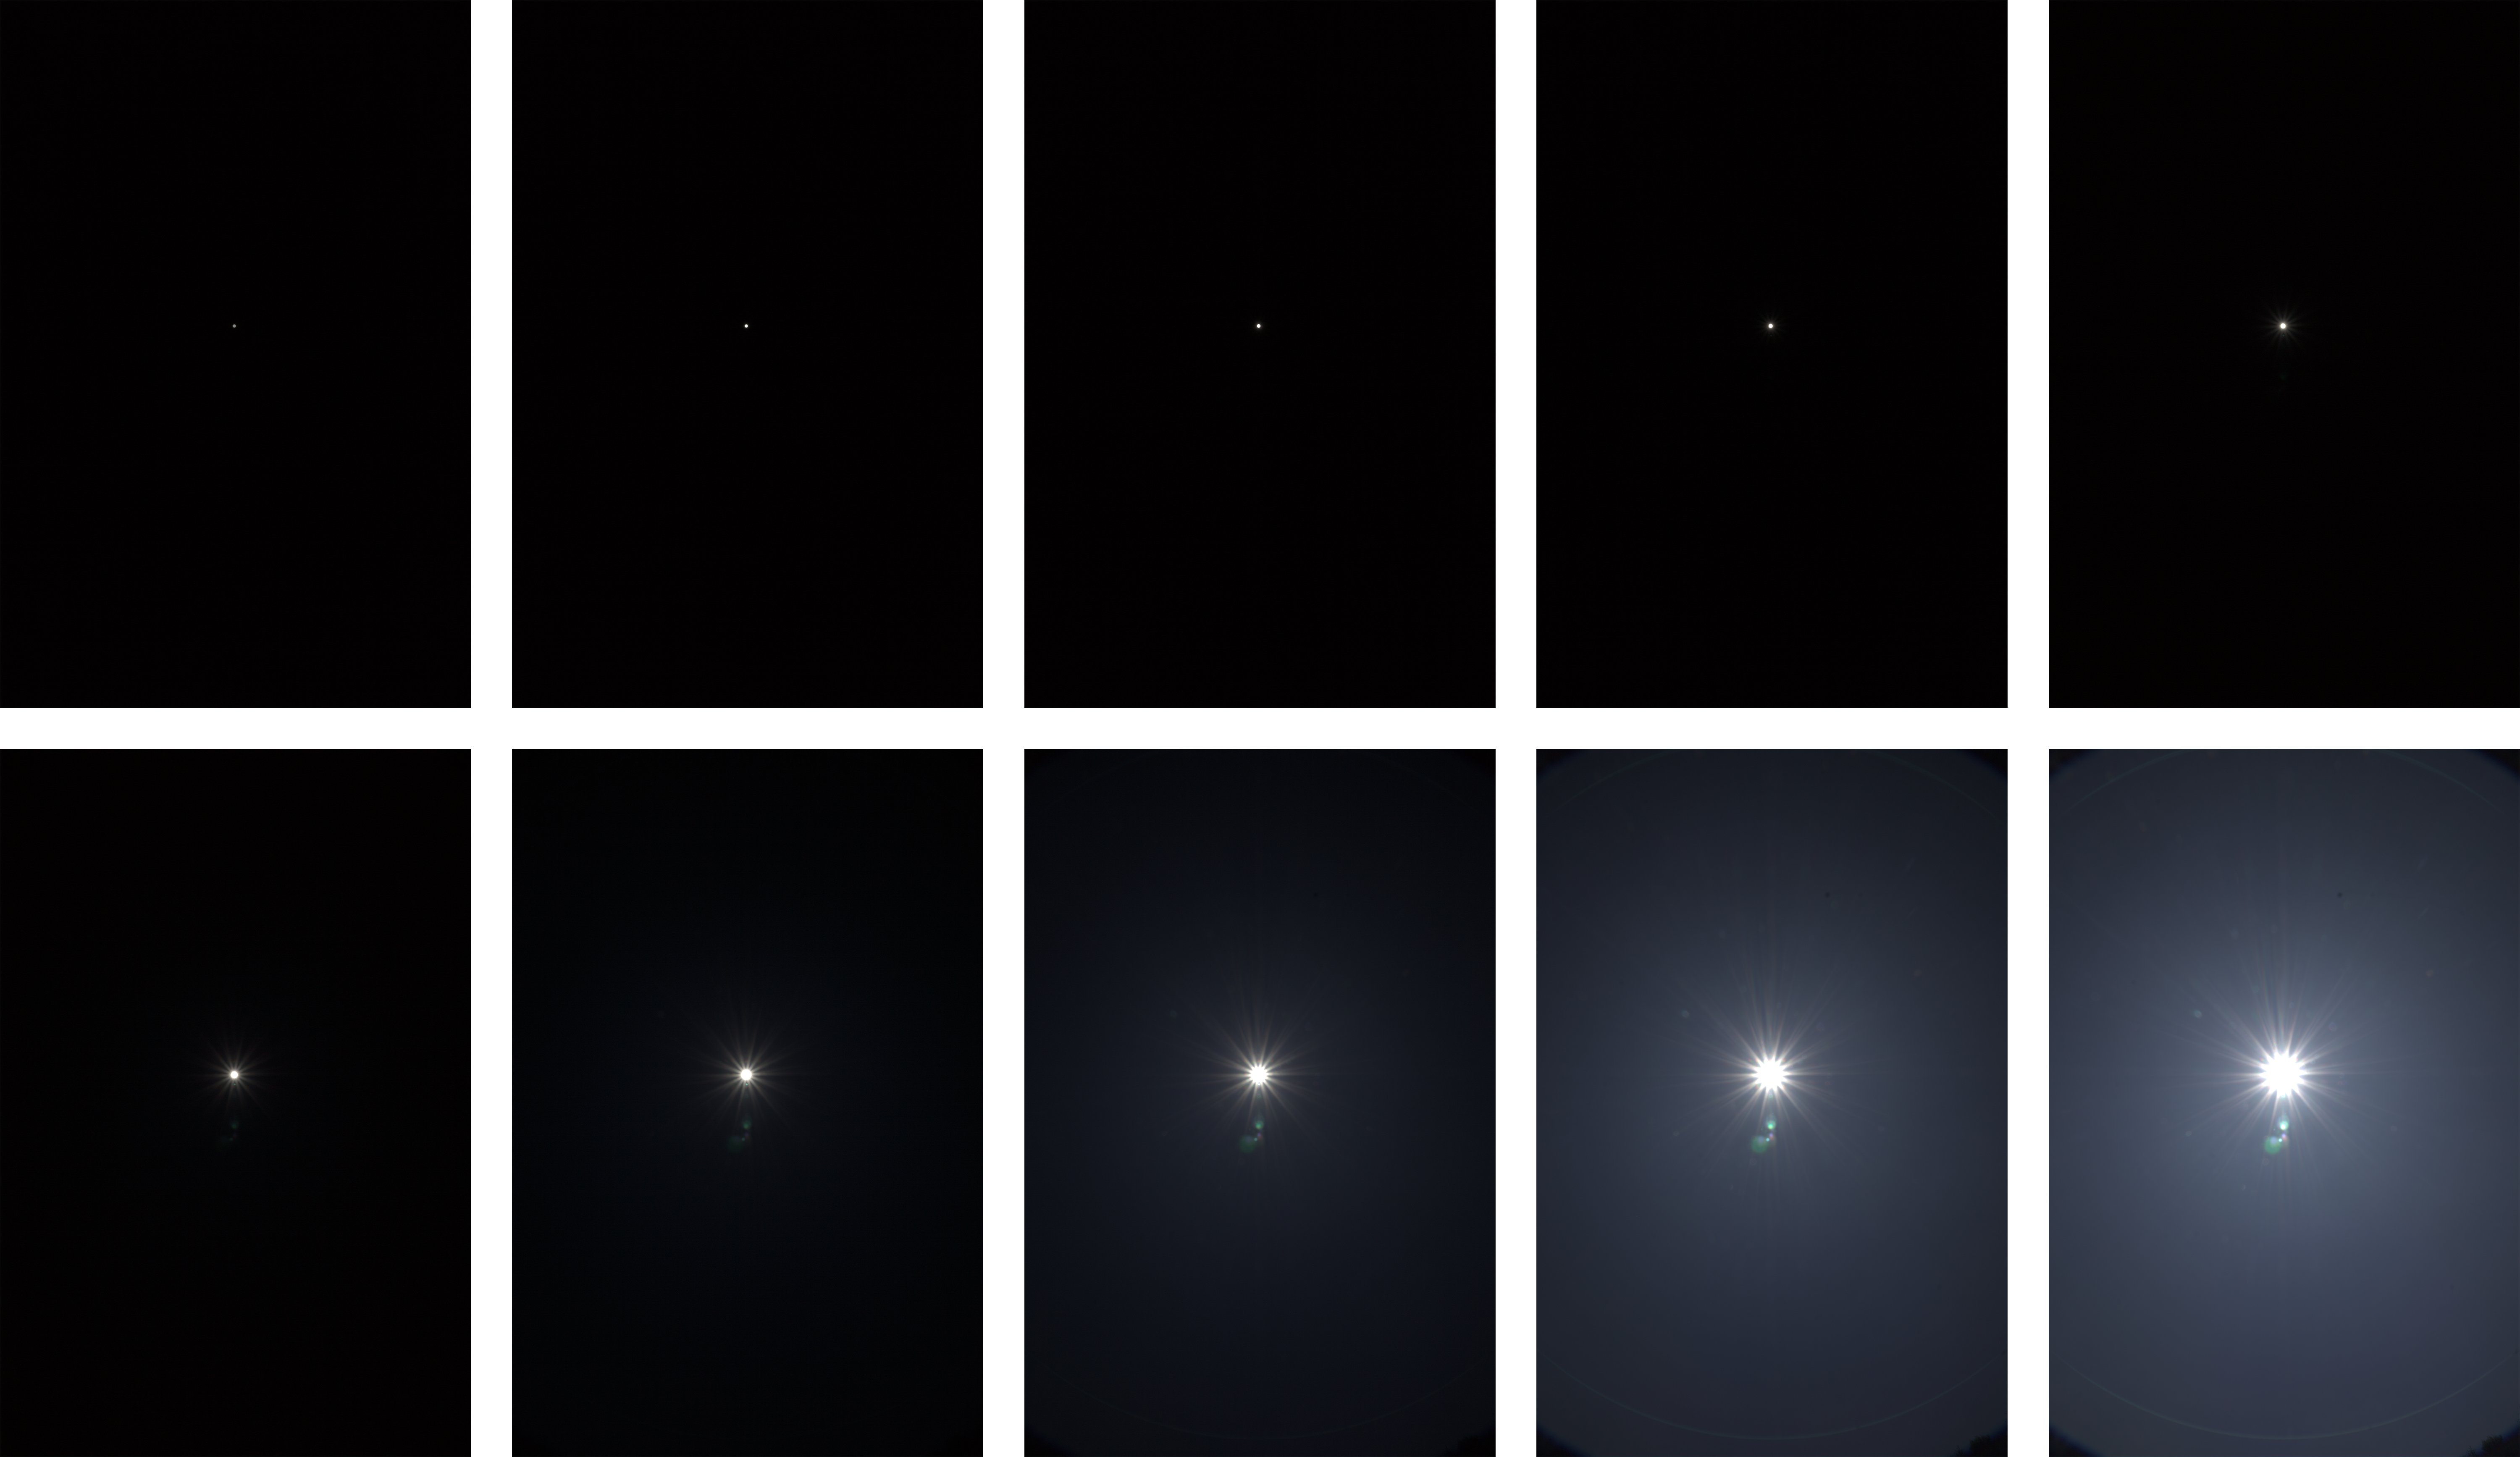
This means my brightest exposure is just bright enough to see some features of the environment (in this case, the sun was very high so only the sky is visible), while the darkest exposure is dark enough to capture the sun without clipping it.
If this is at all confusing for you, here’s a set of original raw images from one of my HDRIs (~3GB). The hdri folder contains the exposure brackets for the whole panorama, and the sun folder contains that special exposure bracket of the sun using a filter. You can use this to test the method I’ll explain below without having to shoot your own.
Step 1: Processing & Merging
Just like with the rest of the HDRI, you first need to convert the raw images into TIFFs using RawTherapee, removing chromatic aberration, reducing noise, etc.
If your ND filter has a color cast/tint, you should correct for it here either by manually adjusting the colors or (preferably) by applying a color profile that you previously generated using a color calibration chart.
Once you’ve outputted the TIFF files, you can merge them into a single EXR file using the same HDR-Merge tool I showed in the main article.
Step 2: Stitching
Now we need to stitch the sun image to the rest of the HDRI, so that the sun is in the right place, is not distorted, and is the correct brightness.
If you’re using my HDR-Merge tool, you should do this during or after stitching the JPG version of the pano, but before swapping the JPGs out with the EXR files.
In PTGui, click Add more images in the Project Assistant tab and select the tonemapped JPG version from HDR-Merge for your sun shot (we’ll swap it out for the EXR version later).
Now add some control points as usual and stitch the sun shot to the rest of the pano. I typically load the sun shot along with the rest of the pano images right in the beginning and stitch with it from the start.
Step 3: Exporting
Here’s where things change slightly.
Before you hit that Create Panorama button to save out the final HDRI, first exclude the sun shot from the pano:
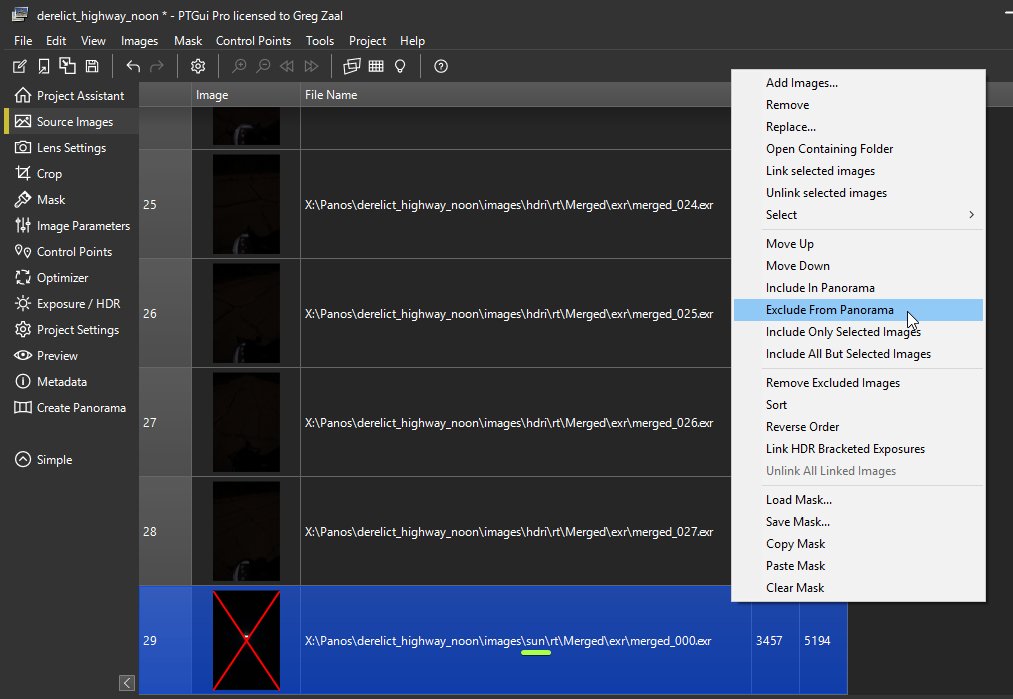
This tells PTGui to completely ignore the sun shot when exporting the pano. This way we can take only the sun disc itself and blend it nicely with the clipped sun manually, avoiding possible banding issues due to the huge difference in exposure.
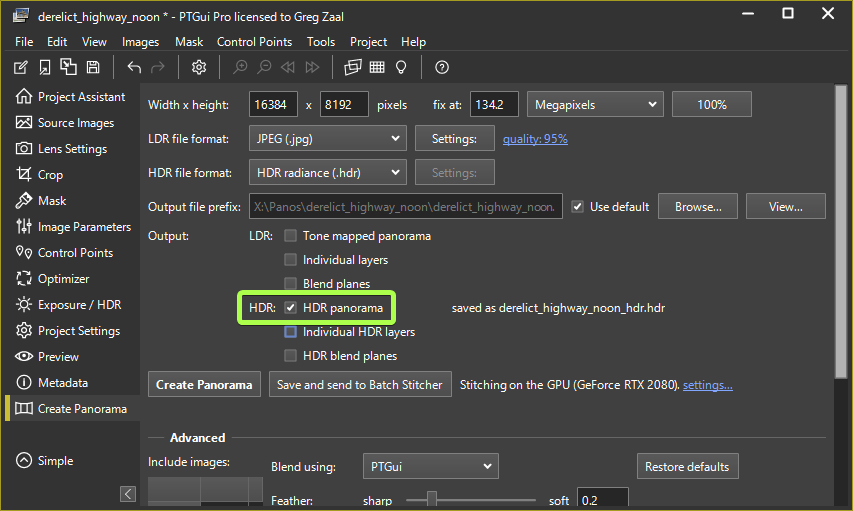
Now you can export the pano as usual, checking only the HDR panorama box:
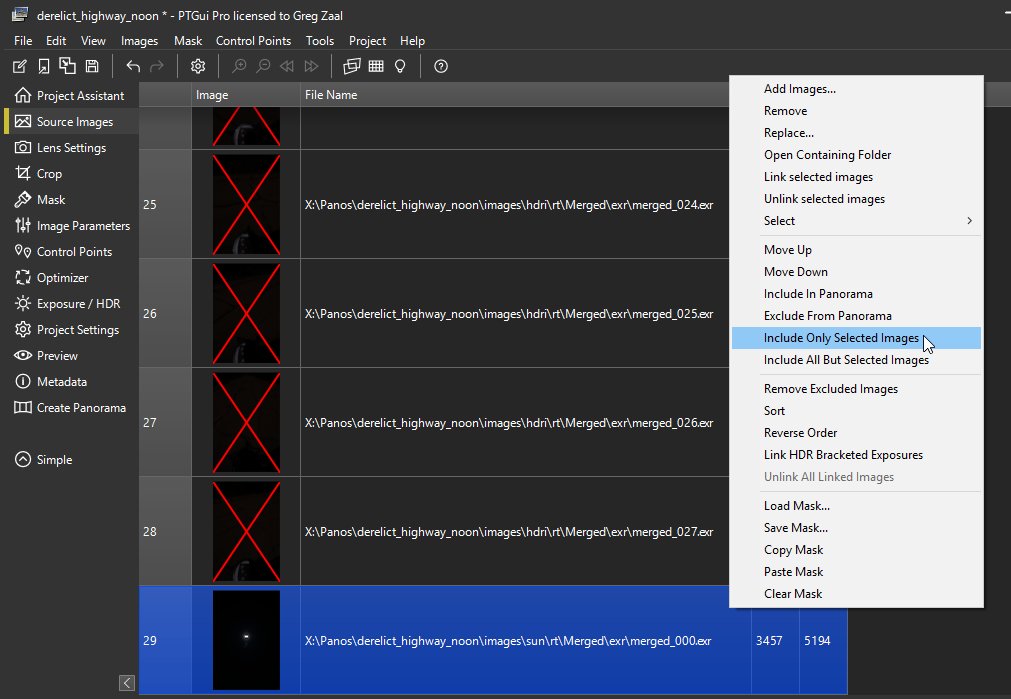
When it’s done, we now want to export just the sun image without rest of the panorama, so exclude all the images except the sun shot:
Now instead of exporting the panorama, export only Individual HDR layers:
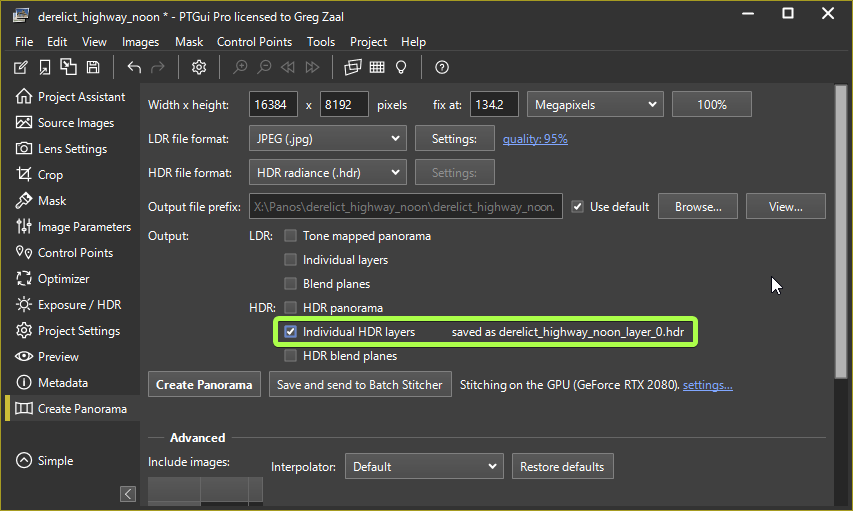
This makes sure we get just the sun image separately without any border blending or exposure manipulation, and without overwriting the main pano file we exported earlier.
Step 4: Add Sun to HDRI
Now we have two files:
The first, blahblah_hdr.hdr is the main panorama with the clipped sun, and blahblah_layer_0.hdr is our sun shot that is unclipped.
Before we copy the sun from the sun shot into the main pano, we first need to compensate for the difference in exposure, including the ND filter used in the sun shot which is not mentioned in the metadata.
To calculate the exposure difference, use this page and enter in the exposure details of the brightest image in each set (that’s what my HDR-Merge tool uses as the anchor point when merging the exposures together – if you used a different merging tool, you may need to calculate it differently).
If you’re using the set of raw images I provided above, you would use IMG_9026.CR2 (or any of the brightest exposures in each bracket, they’re all the same) for the main pano and IMG_9016.CR2 for the sun shot. Right click those files, go to Properties and then in the Details tab you can see all the exposure information:
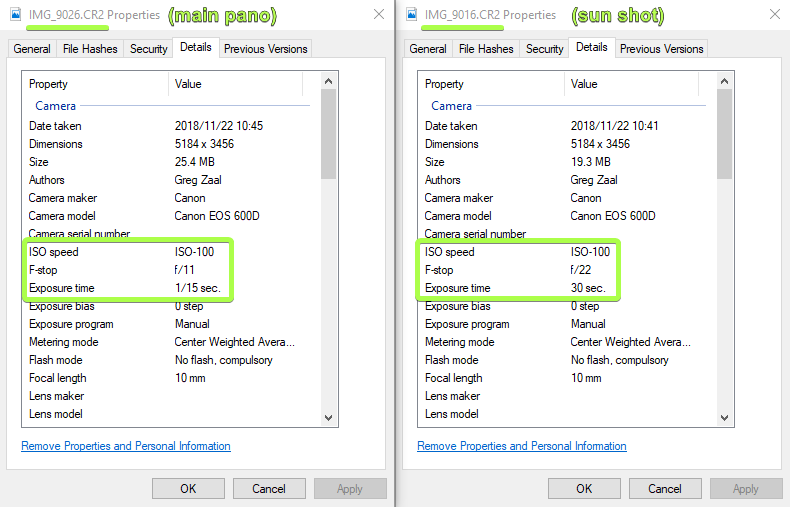
As mentioned, the metadata of the raw files does not include what filter you used, you need to remember that yourself. I use a Trello board so I can create a card on my phone while shooting the HDRI where I write down the filters I use as well as GPS coordinates. In this case I used a 12-stop filter for the sun shot, and a 3-stop filter for the rest of the pano (which may not be necessary but helps prevent any banding around the sun).
Plugging the exposure data (including what filters were used) into the calculator tells us that the sun shot is 2.186 EVs darker than the rest of the pano.
Now, open the main pano in Photoshop or your 32-bit image editing software of choice, and drag in the sun shot to make it a layer on top of the pano in the same document.
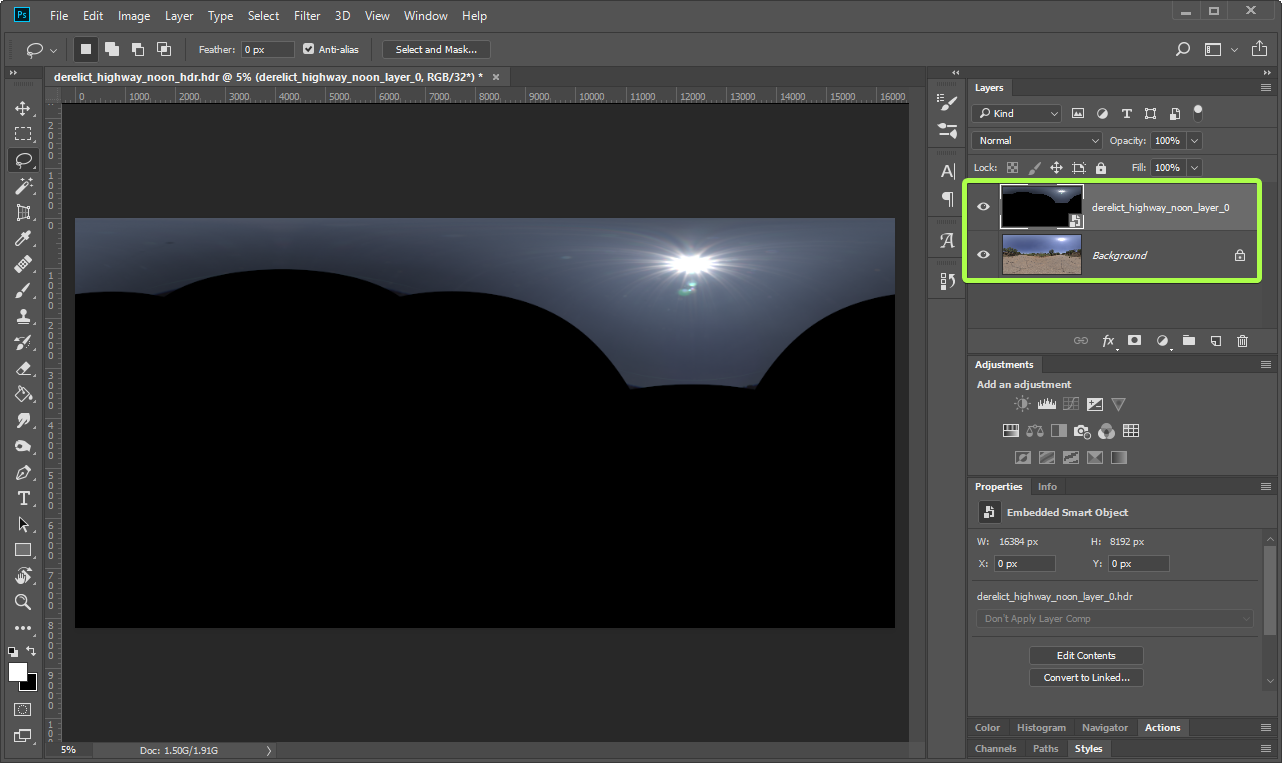
Add an exposure adjustment above the sun shot, and set the exposure to whatever you calculated previously (in my case, 2.186). Make sure this exposure layer is only affecting the single layer below it (the sun shot), and not the whole pano.
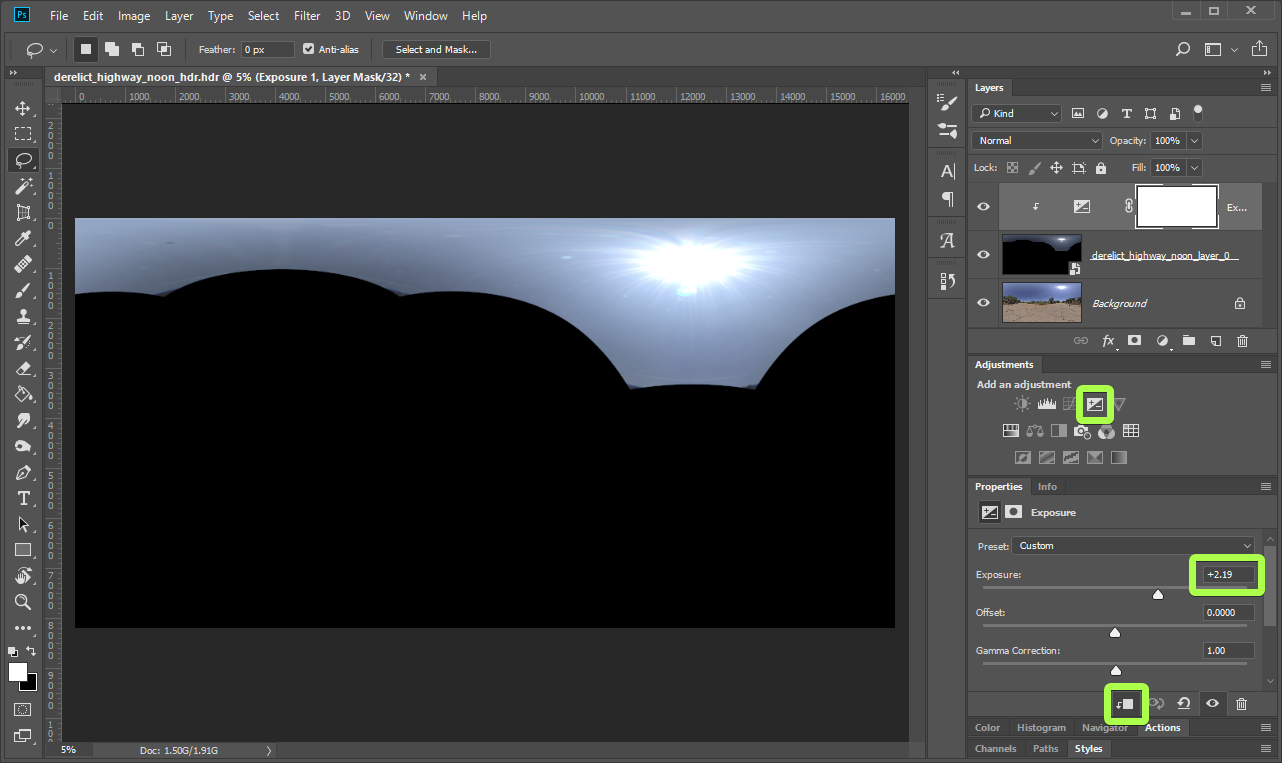
To verify that this exposure adjustment is correct, you can temporarily delete the large black portion of the sun layer and compare the brightness of the sky.
The exposure adjustment is a big improvement, but as you can tell, the sky in the sun shot still looks slightly different. This is because my ND filter is pretty low quality – it has a strong color cast and does not seem to be consistently dark throughout the frame. Since we’re only interested in the sun itself (which I always place in the center of the shot) this is not a huge problem, but it should be noted that you should test your filter(s) thoroughly before using them to determine their quirks.
If you notice any serious problems, you can try to correct the color cast of the filter by calibrating it with a color checker chart, and measure the actual exposure reduction in the center of the frame (it might not be exactly 12 EVs). If you do your research and invest in a good quality ND filter (and keep it clean), you may not need to do this.
Now all that’s left to do is create a mask for the sun layer to show just the disc of the sun itself from that layer and nothing else.
You’ll need to also create a temporary exposure adjustment (this time for the whole image, not just one layer) that will help you see where you’re painting the mask. Remember to delete this exposure adjustment before saving out the final HDRI.
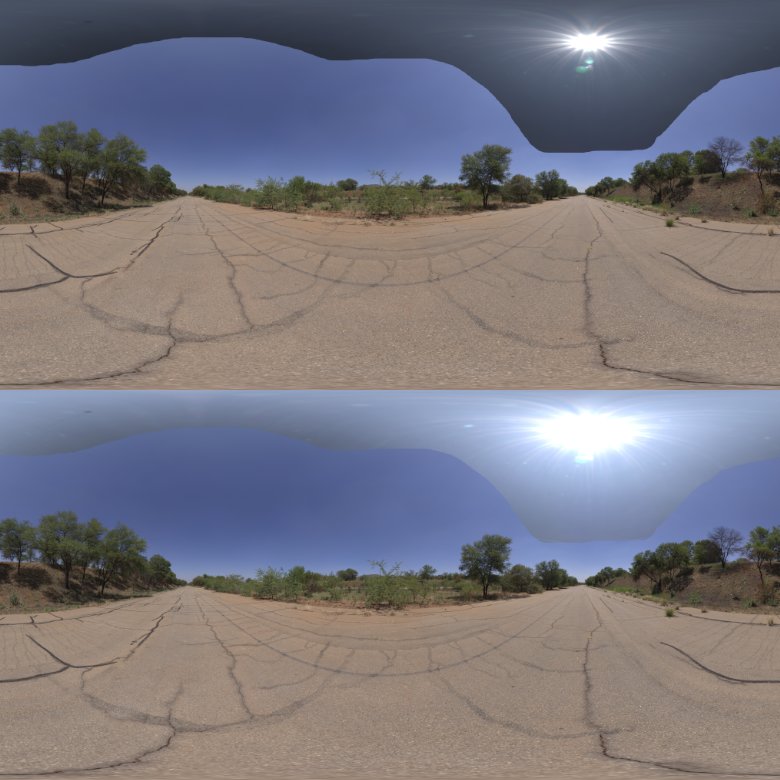
With a (coincidentally) 12 EV darkening using that temporary exposure adjustment layer, this is what the main pano looks like (clearly clipped):
And this is what the sun shot looks like (with the same 12 EV darkening):
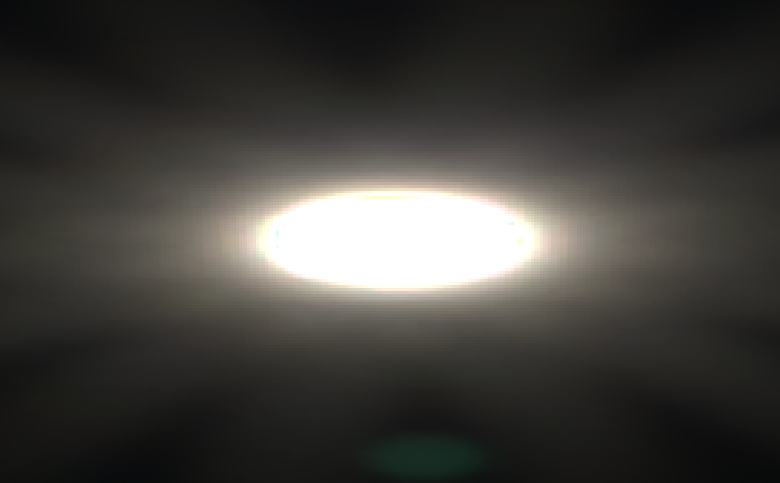
After painting a simple mask to replace the clipped sun disc with the unclipped one, this is the final composite:
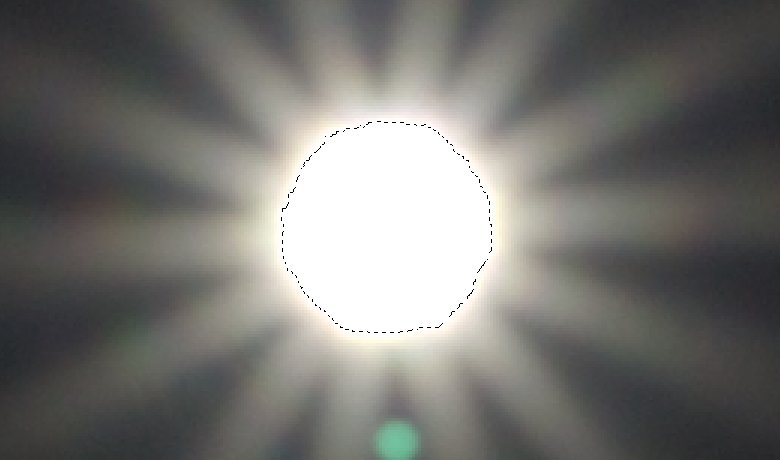
The mask itself looks like this:
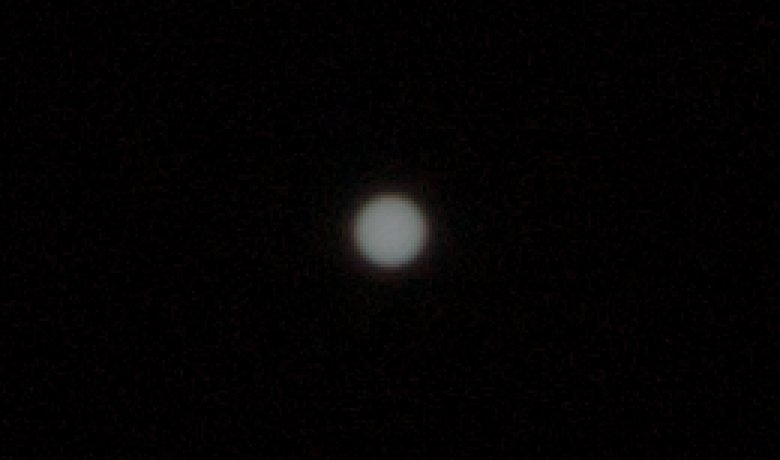
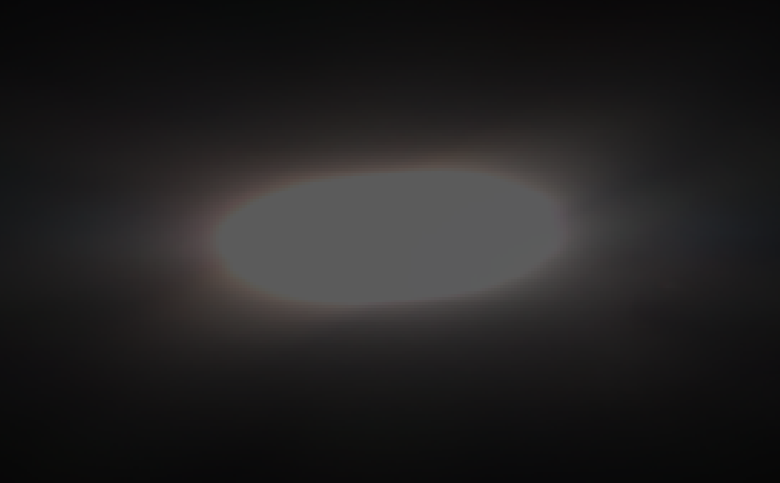
To further verify that the sun is not clipped, lower the exposure until the whole sun is visible without any solid areas of white:
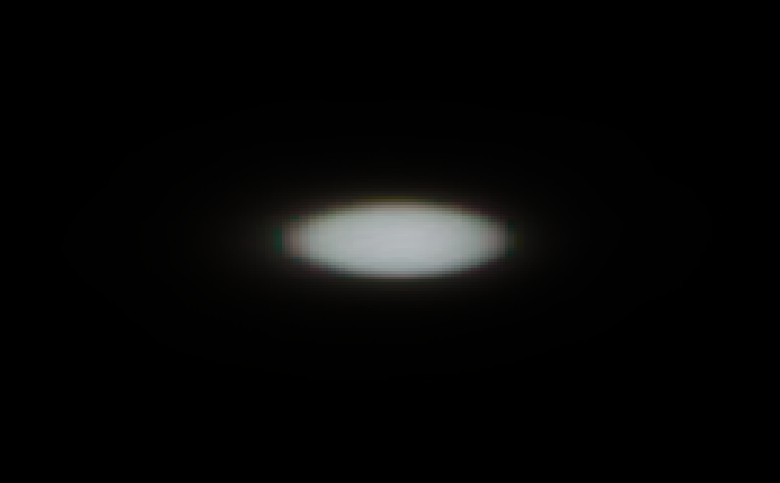
Side-note: the sun appears like an oval because it is near the top of the equirectangular projection – much like countries closer to the poles are stretched on a world map. Once projected into a 3D environment it will look properly round.
You should then gradually raise the exposure and ensure that there is no visible banding at the edges of the mask.
After that, you’re done!
You can now save the image out of photoshop and test it in a 3D scene. The difference between a clipped sun and an unclipped sun is quite drastic:
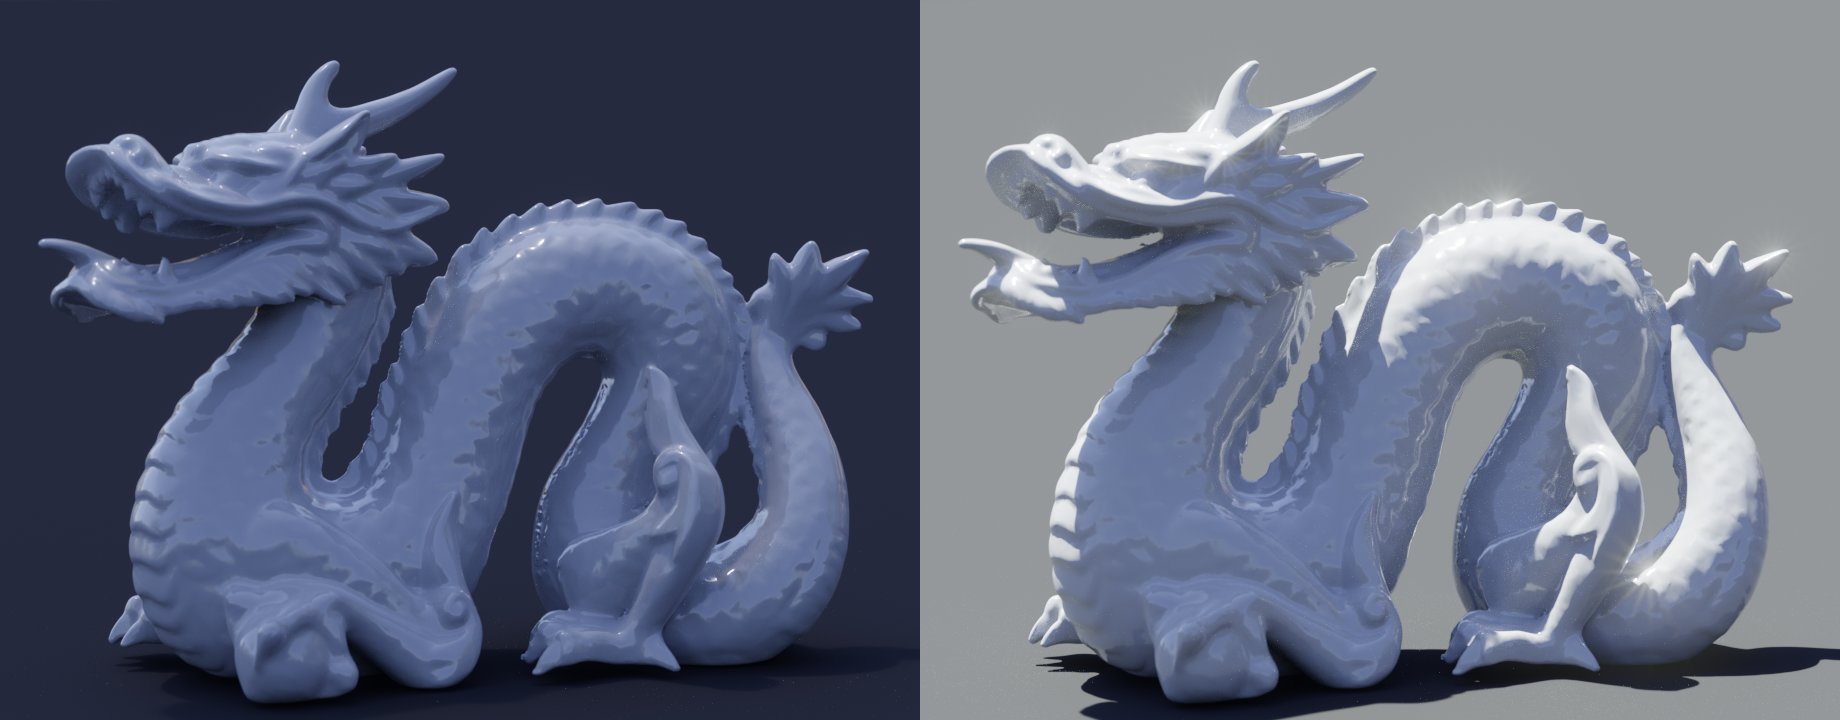
The HDRI strength/intensity used in those two renders is the same (you can tell by the fact that the shadowed areas of the dragon are almost identical in each image) – the only difference is that the right one is using the HDRI after we added in the unclipped sun.
Hi Greg,
I was wondering how you stitch in sun shots when there really isn’t anything but the sun and blue sky to add points to? Also, in your example, when you masked out the tripod, how did you not have a black hole in the nadir?
Thanks again!
— Jeremy
Generally we align the sun shot roughly in PTGui, and then fine-tune the alignment in Affinity/Photoshop afterwards when it’s a separate layer.
Dealing with the area under the tripod is a common issue we haven’t documented yet, there are many ways each with their own advantages or necessary use cases, but these are also well documented elsewhere online. Either you can do a simple content-aware-fill/inpainting or capture it properly and use perspective correction on that shot to align it with the rest of the pano.
Hi Greg,
Thank you very much for sharing.
I have some questions about shooting the sun because I have heard rumors that the CMOS was burned out when shooting directly into the sun. I would like to know if you have encountered such problems while shooting the sun, or if you have taken any measures.
I haven’t had any issues with this, though I am careful not to leave the camera pointing at the sun for no reason (when I’m not busy shooting it).
Remember you have ND filters in front, which drastically cut down on the sun’s power.
Thank you very much for your reply!
Why even bother with such an image? If you have to add an ND, and stop so far down all you will have is a white dot on a totally black image. Why not just created the same dot in photoshop at the same image resolution and add that. Or just take a shot with the lens cap on and add the dot in photoshop, if the camera’s noise is important.
In general, yes, it can be done. However, we are talking about physically correct capture, not representation. In different situations, the sun has different light values, and a “point in Photoshop” is an artistic representation, not an accurate capture as it is. Regarding the second option, the answer is the sky. The sky can be as bright as the sun, and at some point, you may encounter a situation where the minimum exposure values of the camera do not cover the sky completely, meaning that it remains visible in terms of brightness. This is a problem with 360 cameras such as Insta 360, which do not have a variable aperture and whose minimum exposure is not capable of reducing the brightness of sky to 0.
Are there Resources that can be recommended for calibrating ND filters with a color checker?
Also what colorspace should we use for export from rawtherapee?
THanks for the most amazing and most comprehensive hdri guide on the internet!
Cant wait to possibly contribute with hdris to the community <3
I’m not aware of any off the top of my head, but my approach was to simply use the whitebalance picker to calibrate and save a WB-only profile for each filter. This is not exactly scientific or utilizing the chart to it’s full potential, but it’s enough to counter the subtle color shift in my case. If anyone knows better, feel free to link us 🙂
Edit: to clarify, we standardize our whitebalance values for all outdoor daytime HDRIs instead of doing custom whitebalance for each HDRI – mainly to maintain color of lighting so sunsets stay warm. So I shot a grey card in clear daylight to calibrate this value for our camera+lens combo with no filter, and then did the same for each filter and each combination of filter. The key is to do this all at the same time and with the same lighting conditions, so that the WB profiles are all relative to each other, and are actually correcting for the filter differences rather than lighting differences. We also publish chart shots for all our HDRIs in case anyone wants to do any further calibration, but don’t actually use these for processing ourselves (the built-in defaults in RawTherapee are extremely close for our camera, so we don’t actually calibrate the full color profile, just the whitebalance is enough).
I believe we export in sRGB, though if exporting 16-bit tiffs these might be linear, not 100% sure. Either way, it’s not something you really need to worry about, as the default behaviour in RawTherapee and PTGui is set up well.
I’d love to see what you shoot! 🙂
Tanks alot for the explanation Greg!
I heard about this method from InlightVFX, but havent tried it yet cuz of python stuff..
https://www.youtube.com/watch?v=inLKBxAnlzU
but maybe it might work even better in the new resolve raw photo page..