
This post continues from our main HDRI workflow article:
https://blog.polyhaven.com/how-to-create-high-quality-hdri
For any 360° panorama, removing the thing that the camera is attached to is one of the main challenges.
When shooting an HDRI from a tripod, you have essentially three options:
- The patch tool in PTGUI 13.
- Using viewpoint optimization shots.
- The “We’ll fix it in post” method.
The Patch Tool

PTGui 13 introduced a very capable patch tool specifically for this purpose. It allows you to fill holes in your panorama directly within PTGui using the same blending and seam optimization methods that are used in the rest of the panorama.
This has become our go-to method for all HDRIs, except where a patterned floor is involved.
Rather than explain how to use it here, check their tutorial video or documentation.
Using viewpoint optimization shots
The only way to see what is beneath the camera is to move the camera out of the way and take a photo (or two) of the ground that was beneath it:
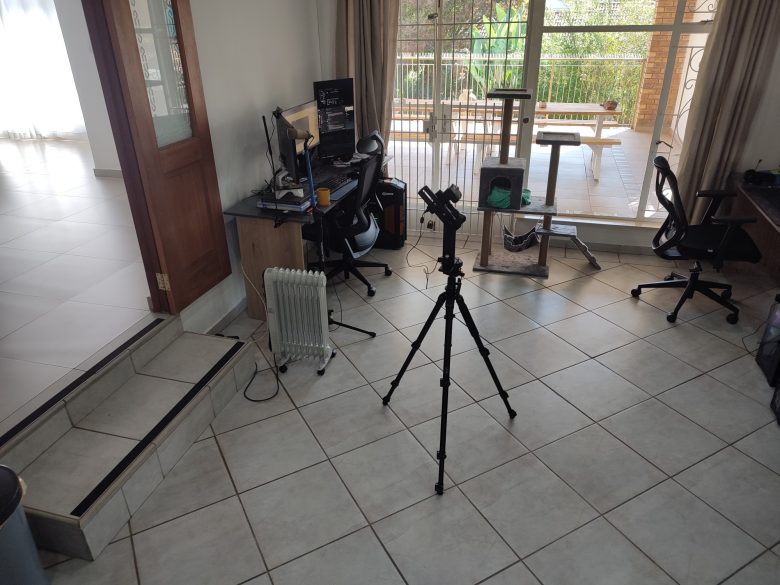
After shooting the HDRI completely, move the camera and face it back towards the spot where the tripod previously stood.
Make sure to keep light directions in mind and try to get a clean shot of the ground without any shadows in it.
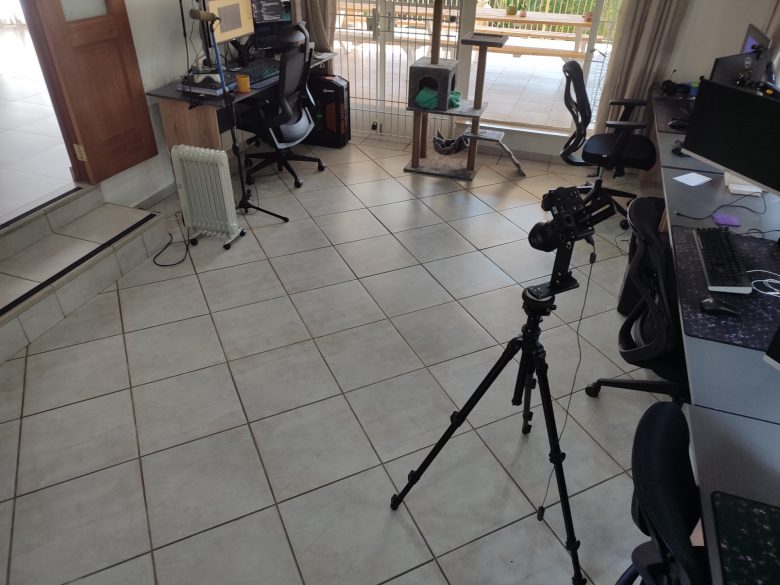
In the example above the shadows are not really noticeable, but imagine doing this in sunlight you’ll need to move the camera perpendicularly to the shadow line in order to avoid both shadows and specular reflections in your shot.
In this case, the floor is quite reflective, so moving the camera too far away (to shoot at more of a grazing angle) and in the wrong direction might cause some reflections to be more visible in the area we’re trying to capture.
Then back home, you first need to tell PTGui that your image has changed position. To do this, simply right click the image in the Project Assistant and enable viewpoint optimization:
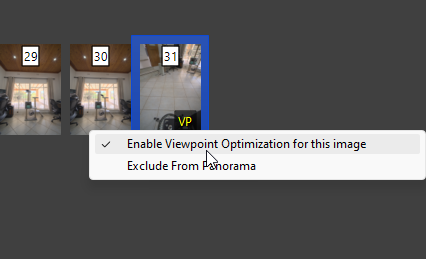
You only need to do this for the single image where you moved the tripod away.
Then, the hard part:
PTGui is not smart enough to figure out the 3D position of this image relative to the rest of the HDRI. Trying to align your project will likely result in bad seams and huge error values.
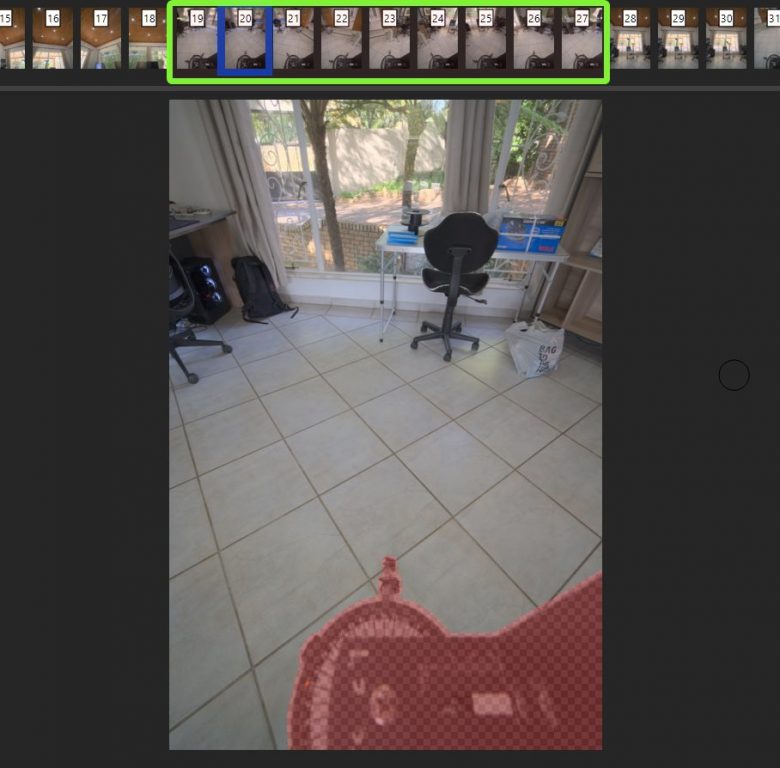
To actually use viewpoint optimization correctly, you’ll need to manually add a dozen or so control points between the VO shot and a handful of other shots in your panorama:
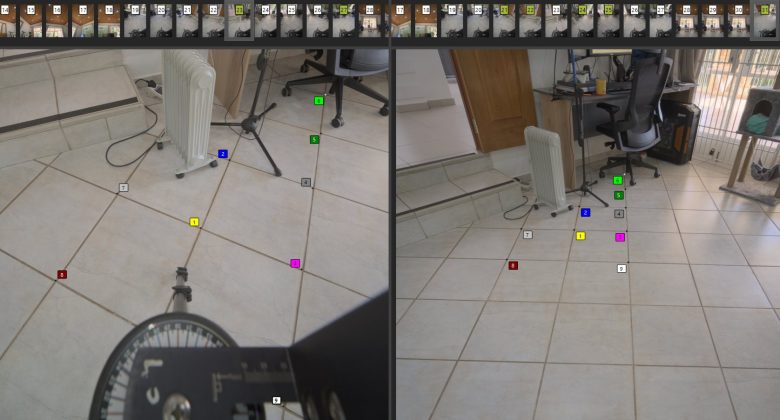
You’ll likely need to do this to at least 3 images, and it can be somewhat disorienting when using images that are facing in different directions from the VO shot.
Before you press F5 to try and align the panorama again, you may want to add a large mask to the VO shot that blocks out anything that isn’t the floor itself:
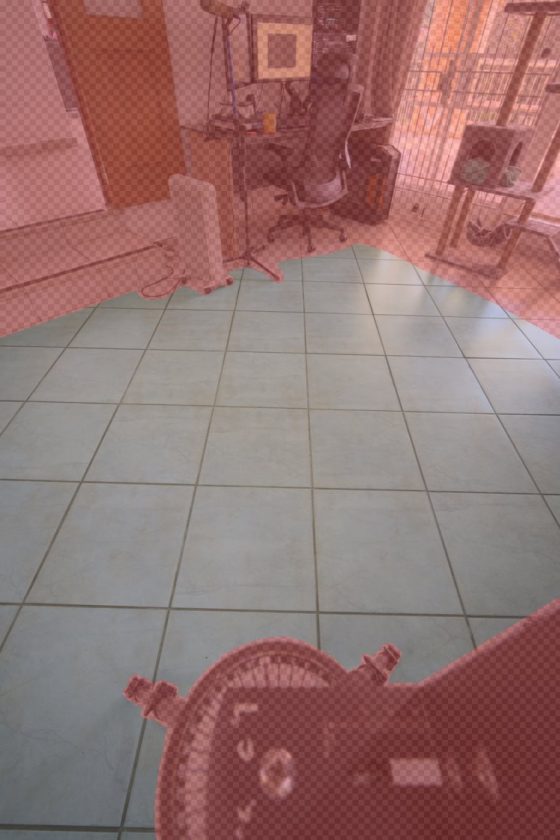
Likewise, if you haven’t already, now is the time to mask out the tripod in all your other downward-facing shots, to make sure PTGui will use the VO shot for the bottom area:
With good control points and a nice flat surface, the result can basically perfect:
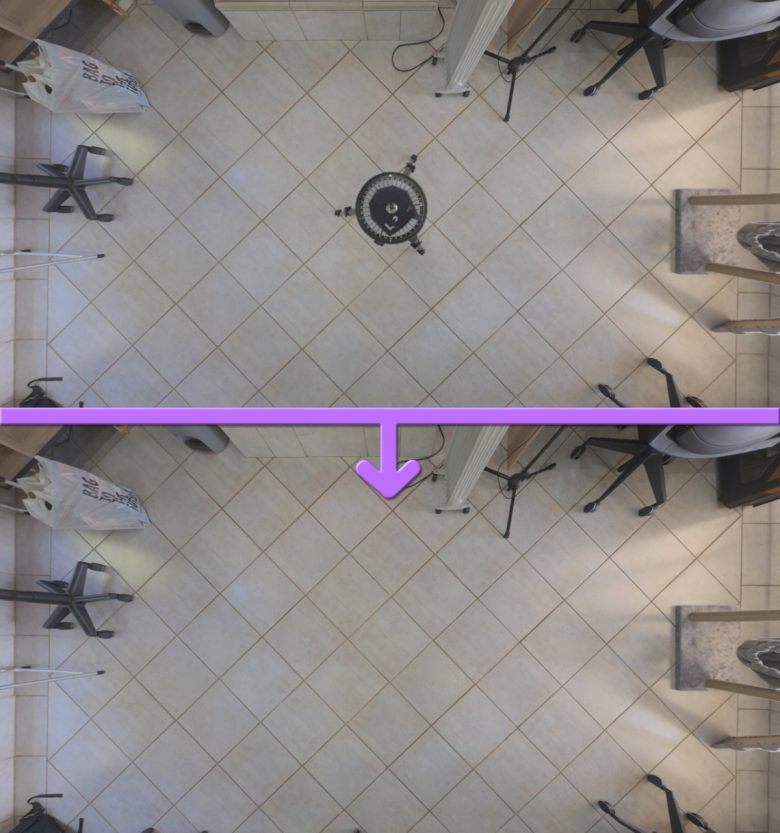
Viewpoint optimization is good for when you have some kind of pattern beneath the camera, such as bricks, tiles, carpet, or any other flat recognizable features that need to be captured accurately.
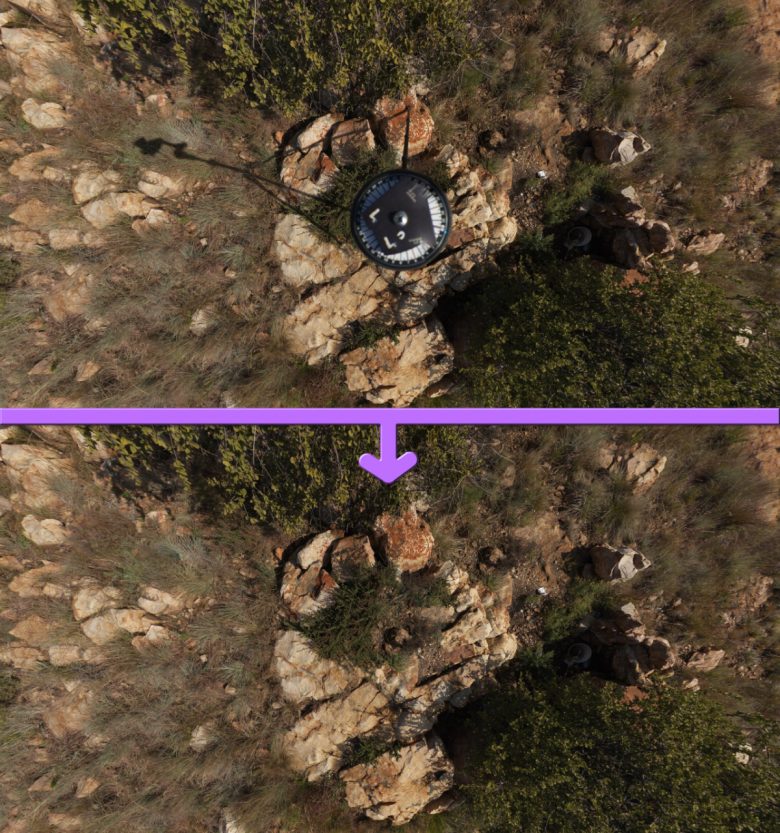
However, if the surface you’re shooting on is not nice and flat, for example rocks, grass, or anything in the natural world really, then viewpoint optimization is going to give you some distorted results.
In those cases, you’ll probably end up needing to paint out some artifacts manually later. And if you’re painting things manually later, why not skip the viewpoint optimization process entirely (placing control points manually is after all the most time consuming part of the whole stitching process) and just paint the tripod out manually?
The “We’ll fix it in post” method
In any natural environment where there isn’t any clear structure like bricks or tiles, you can easily get away with doing a simple inpainting (content aware fill) or some clone stamping.
One core requirement of painting the poles in an HDRI is being able to remove the equirectangular distortion. Before I found Affinity Photo, I would convert the HDRI to a cube map, edit the bottom cube face, and convert the cube map back to an equirectangular map.
Luckily, using Affinity Photo’s “Live Projection” feature, you can easily paint at the bottom of an equirectangular image where the distortion is severe:
And unlike Photoshop, Affinity Photo actually lets you use all of its tools when working on 32-bit images like this, including inpainting (Alt-Backspace) and healing brushes.
TLDR
If your floor is patterned, use viewpoint optimization shots.
Otherwise, if you have PTGui 13+, use the patch tool, or for older versions it’s still easier to paint it out in Affinity.
1 thought on “Removing the Tripod from HDRIs”