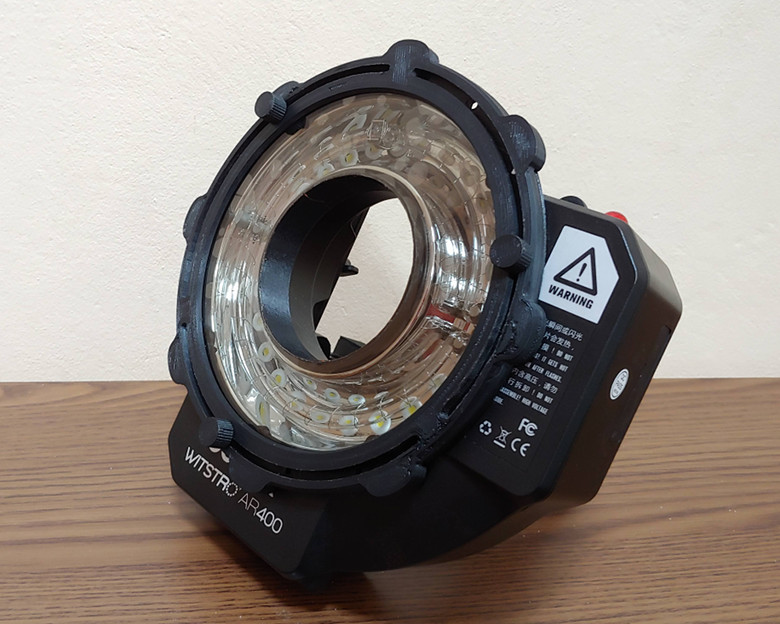
I am by no means a product engineer, but I figured I would share the files for our 3D printed polarizer mount for the Godox AR400 ring flash we use for texture scanning.
This is for cross-polarized photogrammetry – to scan surfaces under controlled light with minimal to no reflections.
Erik from scanspace.nz sells a ready-made, better engineered version of this for around $120, but I figured I would share my version for anyone who doesn’t want to wait for shipping from New Zealand and has a 3D printer.
Some additional parts you will need:
- A polarizing film big enough (18cm square).
You can get large sheets made for the film industry, but the only thing suitable that I could find locally was a replacement polarizing film for an iPad pro (12.9″). - Three M3x10 thumb screws, or M3x12 bolts – and nuts.
- (Optional) A piece of 3mm clear acrylic, 18cm square.
The widest part is 225mm, so your printer will need a bed at least this big on both axes.
If you have M3x10 thumbscrews, you don’t need to print the Thumb_Screw.stl
Fixed Ring
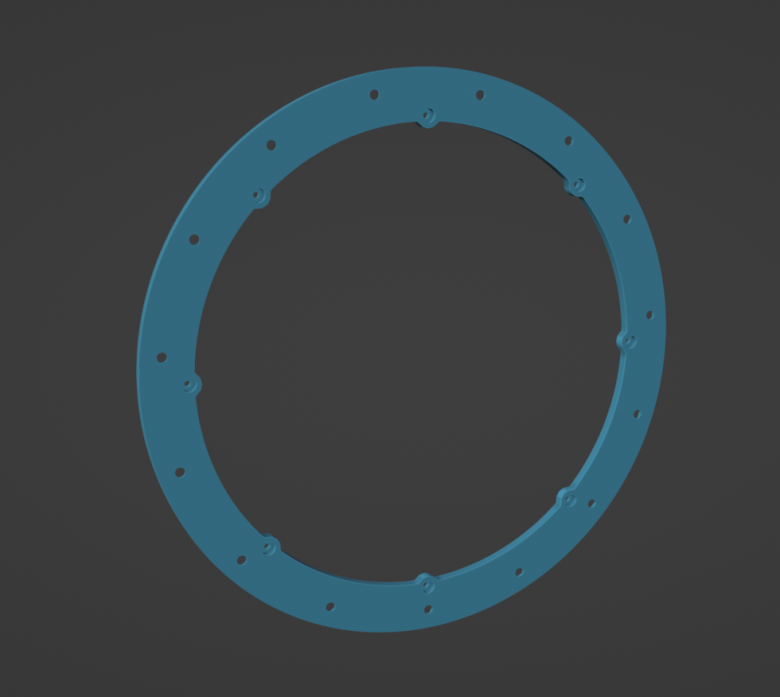
The hexagonal slots on the back are there for M3 nuts, used to adjust the rotation of the polarizer.
I designed a lot of adjustment into this rig, but in the end it wasn’t necessary as the polarizer just needs to be fixed in the “correct” position and never adjusted again.
So you don’t need to fill all these slots with nuts, just the 3 you’ll actually need (at the 6-oclock, 2-oclock and 10-oclock positions. Check the photo above if this is unclear).
Then the whole Fixed Ring part mounts directly to the flash using the existing tiny screws that you’ll need to remove from the existing plastic cover.
Polarizer & Center Support

The polarizer (and optional acrylic) need to be cut into a circle 180mm wide, with a hole in the exact center that’s 94mm.
The acrylic is there to support the floppy polarizer, and can be used instead of the “Center_Support” part for full transparency. But cutting acrylic into perfect circles is difficult, you’ll likely need a router and a circle cutting jig.
If you can’t make the acrylic work, just use the Center_Support part instead.
Don’t glue the polarizer in place, just let it sit loosely on top for now.
Inner Hoop

Glue the acrylic/center support to the rim on the inner hoop
Thumb Screws

If you couldn’t find actual M3x10 thumb screws, you can print the thumb screw parts and glue regular M3x12 bolts into them.
The extra 2mm on the regular bot (M3x12, not M3x10) is so you can thread an additional nut on the bolt all the way to the end (hence why the hole on the printed part is hexagonal) to help keep it straight.
Outer Hoop
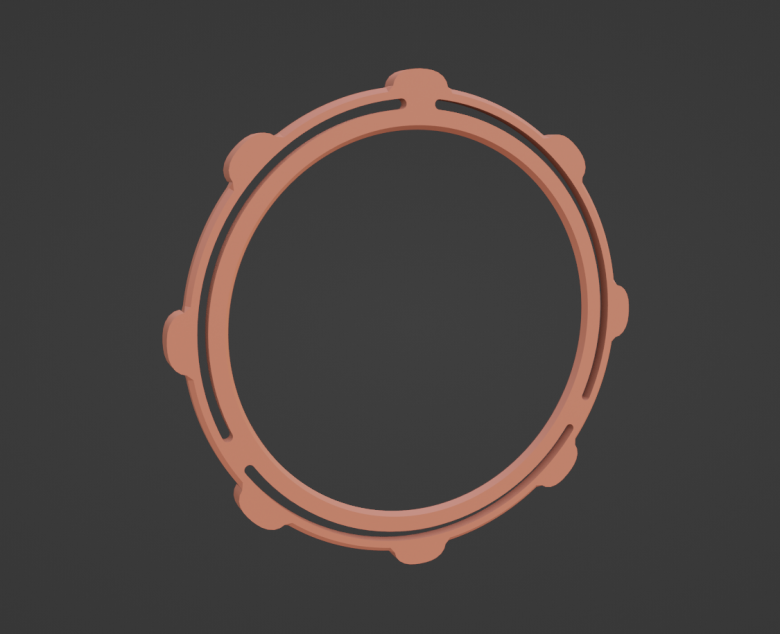
Finally the outer hoop simply sits on top and sandwiches everything. It’s held in place with the thumb screws threading into the nuts you placed in the fixed ring earlier.
If you don’t tighten the screws all the way, you should have some adjustability to fine-tune the rotation of the polarizing filter.
Testing
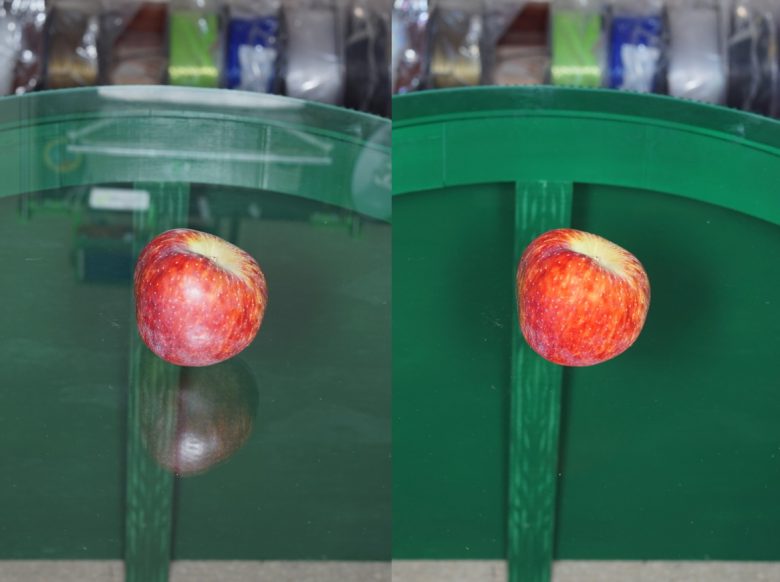
Be sure to test everything out in a dark room with your camera (and polarizing filter on the lens too), using the “always on” video light mode of the AR400 until all reflections are removed, both on the subject itself and of reflections of the subject on a shiny tabletop.
You may need to flip the polarizing sheet around and tweak the rotation very carefully to get rid of all reflections.
Once done, you can tighten the thumb screws down further until nothing budges, but not so tight that it damages the plastic.
ALIGONULACAR
hello, I couldn’t find circular polarized films anywhere, do linear films work? If I take the one from this link, will it work for me? https://tr.aliexpress.com/item/1005004825634643.html?channel=twinner
I believe that should work. The stuff I bought does not specify if it’s circular or linear.
Here are some articles suggesting it doesn’t make a difference for photography:
https://www.lindseyoptics.com/blog/linear-polarizer-vs-circular-polarizer-whats-the-difference/
https://www.digital-photo-secrets.com/tip/6978/linear-versus-circular-polarizers/
Hello, thanks for sharing that precious content. Everything looks fine but after trying to print it on my prusa Mk3s, I figure that 225mm is not fitting on the printing bed. If you interrested, I can leave you the remixed files.
Nicolas, I have the same issue. If wont fit on my Mk3s bed….. if you dont mind sharing your files so I dont need to deal with Blender.
Are you meant to take off the original clear plastic housing and discard it with this design?
Take it off, but keep it aside in case you want to use the flash without the polarizer in the future 🙂
Link to ipad polarizing film used?
This is the specific thing that I bought: https://deal-hub.co.za/collections/lcd-screens/products/10-pcs-top-lcd-filter-polarizing-films-for-ipad-12-9-inch-series
Hi
I’m new to 3D Printing. What infill amount did you use when printing?